Collaboration is key in the world of Git version control. But keeping track of changes from multiple developers can get tricky. This blog post dives into two essential Git features—remotes and cherry-pick—that empower you to streamline your workflow and effectively manage contributions.
Understanding Git Remotes: A Bird’s Eye View
By default, your GitHub repository typically has a single remote—the origin, representing the main repository you cloned from. However, in larger projects with multiple developers, things get more interesting. Often, developers create personal forks before they push their code.This allows them to work on a separate copy of the code base, and once they are satisfied with the changes, they can merge back into the main codebase.
Here’s where remotes come into play. They are references to additional copies of your Git repository, potentially containing valuable contributions from other developers.
Let’s use an Open-Source project: Lottie
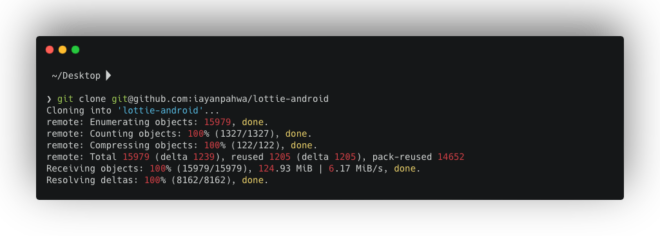
Imagine we’re working with the fantastic Lottie by Airbnb, a library that renders After Effects animations on mobile platforms. We’ve cloned a fork (iayanpahwa/lottie-android) and want to explore changes made by other contributors to lottie (gpeal and felipecsl).
Adding Remotes: Reaching Out to Other Forks
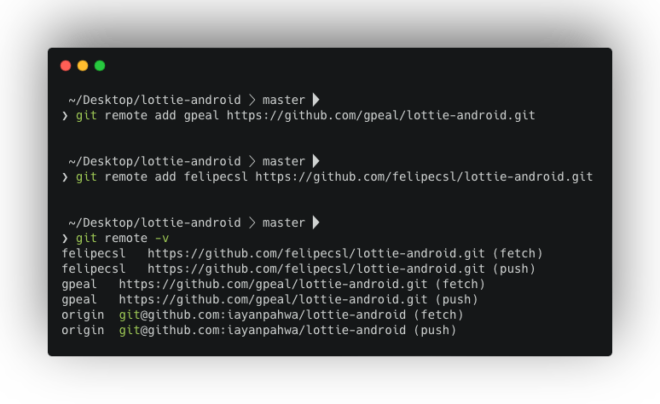
To access these developers’ workspaces, we can add them as remotes using the git remote add command:
Now, using git remote -v, you can see all configured remotes, including their URLs.
Fetching the Goods: Downloading Changes
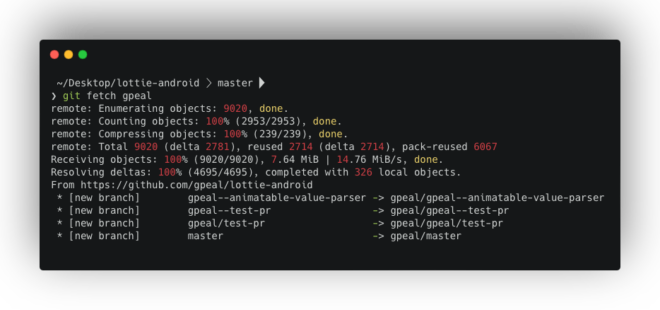
With remotes in place, we can retrieve changes from other contributors using git fetch.
Fetching from a specific remote:
Fetching from all configured remotes:
git fetch --all
This downloads the commits made by these developers without integrating them into your local working directory yet.
git cherry-pick: Borrowing the Best Bits
Git cherry-pick allows you to meticulously select and apply specific commits from other branches (including those fetched from remotes) onto your current branch. This is particularly useful for integrating contributions from multiple developers, testing them individually, or incorporating specific fixes.
A Real-World Cherry-picking Scenario
Imagine you manage an open-source project that receives a wave of pull requests. You might want to test these contributions together before merging them. Here’s how cherry-picking can help:
Create a New Branch:
git checkout -b my-test-branch
Fetch Necessary Code (if not already done): Use git fetch as explained earlier.
Cherry-picking Commits: Once you have access to the desired commits, cherry-pick them one by one using their commit hashes:
git cherry-pick <commit_hash>
For instance, to test a specific commit (648c61f5275998c461347b5045dc900405306b31) by contributor gpeal:
git cherry-pick 648c61f5275998c461375647845dc900405306b31 [ commit made by gpeal ]
This brings gpeal’s changes to your my-best-branch for isolated testing.
Remember: Cherry-picking can rewrite history, so use it cautiously. Always create a dedicated branch for testing before integrating changes into your main codebase.
Wrapping Up:
By mastering remotes and cherry-pick you can effectively collaborate on Git projects, leverage valuable contributions from others, and ensure a smooth and efficient development workflow.
Feel free to reach out with any questions! Happy coding! Do check our blogs on git internals for more learning:
In software development, we rarely build projects entirely from scratch. We leverage open-source libraries and frameworks to accelerate development and avoid reinventing the wheel. But managing these dependencies can quickly become a tangled mess, especially as projects grow and dependencies multiply.
This blog post explores a simple yet powerful Git feature called git-submodule, which streamlines dependency management and keeps your codebase clean and organised.
The Downside of the Manual Approach
Many developers resort to simply manually cloning and directly pushing dependency code into their main project’s codebase. While this may seem convenient at first, it creates several challenges:
Version Control Issues: Updating dependencies becomes a manual process, increasing the risk of compatibility issues and security vulnerabilities.
Upstream Changes: New features or bug fixes in the original library require manual integration, which is time-consuming and error-prone.
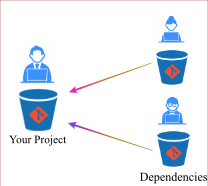
Introducing Git Submodules
git submodules allow you to integrate external Git repositories (containing your dependencies) directly into your project. This creates a modular approach with several benefits:
Independent Updates: You can update submodules individually without affecting your main project code.
Version Tracking: Submodules track the specific commit hash of the dependency you’re using, ensuring consistency and reproducibility.
Modular Codebase: Your project remains clean and organised, with dependencies clearly separated from your core code.
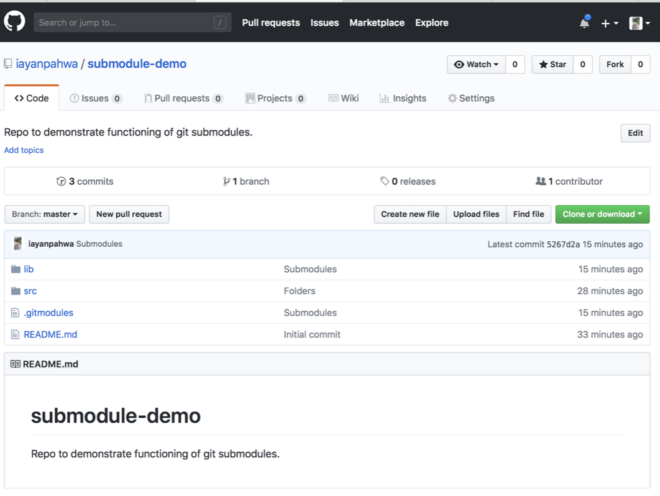
Putting Git Submodules into Action
Let’s walk through a practical example. Imagine a project named “submodule-demo” that relies on two libraries:
FastLED: A library for controlling LEDs
PubSubClient: A library for implementing an MQTT client
Here’s how to leverage git-submodules to manage these dependencies:
Project Structure: You can create a dedicated directory (e.g., lib) within your project to store dependencies.
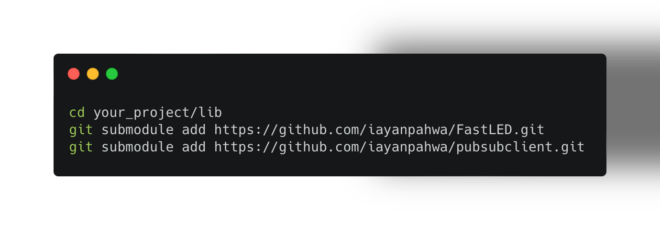
Adding Submodules: Use the git submodule add command to specify the URL of the external repository and the desired submodule path:
cd your_project/lib
git submodule add https://github.com/iayanpahwa/FastLED.git
git submodule add https://github.com/iayanpahwa/pubsubclient.git
This fetches the code from the specified repositories and stores them within the lib directory.
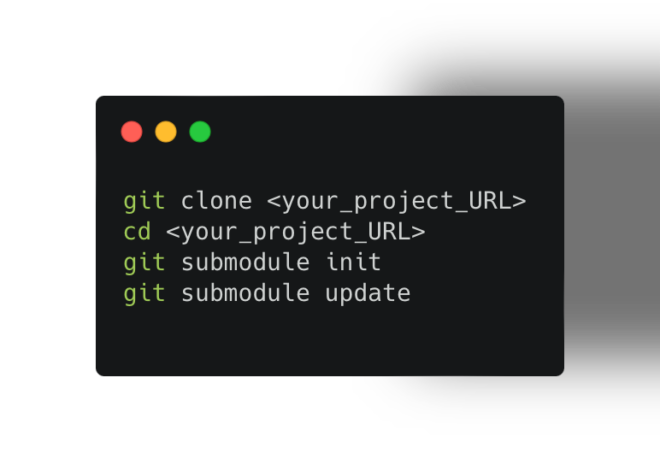
3. Initialising and Updating: Anyone cloning your project can easily initialise and update the submodules using the following commands:
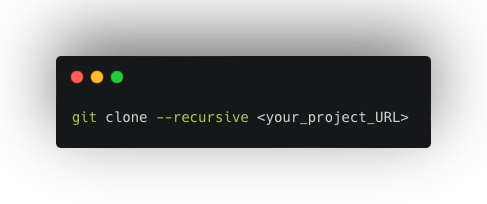
Alternatively, you can use the --recursive flag during cloning to automate these steps:
git clone --recursive <your_project_URL>
4. Version Control: Git submodules record the specific commit hash used from each dependency. This ensures everyone working on the project uses the same library version, promoting consistency and preventing compatibility issues.
Beyond the Basics:
While submodules default to fetching the latest commit from the dependency’s main branch, you can specify a different branch or commit hash. Refer to the official Git documentation (https://git-scm.com/book/en/v2/Git-Tools-Submodules) for details on advanced usage.
Key Takeaways
By embracing git submodules, you can effectively manage dependencies, improve code organization, and streamline project collaboration. This approach promotes a more modular and maintainable codebase, saving you time and headaches in the long run.
Feel free to explore our other blog posts on Git internals for further insights!
“… However, when we talked with web developers, they still struggled with using Windows as their primary devbox.”
The above quote is from Kevin Gallo, the VP of Windows Dev platform, and was delivered around mark 0:38 of his presentation in Microsoft’s Build 2016 keynote. He then continued with the observation that “… many of them have workflows which rely on open source command line tools, scripts and frameworks”, and finished with a slide that his audience was – at first – slightly unsure on how excited to get about: Bash is coming to Windows.
Screenshot #1: Kevin Gallo’s slide from Build 2016 announcing Bash coming to Windows
If you let the video play for another 7 seconds, you’ll also catch a glimpse of Gallo’s audience. You can see the emotions depicted on their faces form a picture that explains perfectly the complex (and sometimes tumultuous) relationship of Microsoft with Linux and the Open Source world. Three persons are smiling excitedly and beginning to slow clap (the ones that suddenly realise how much easier managing their OS stack or scripting their Windows environment will become). You then have the classic cautious indifference of the majority of developers that wait to see whether this is “worth getting excited about”. Finally, you can also detect some unguarded annoyance from the fanboy crowd (“Seriously? I have to sit and hear about Bash? What’s wrong with PowerShell?”).
Personally, I belong to the first group. Despite working with open source technologies since the beginning of my professional career back in 2003, I’ve never managed to move away from Windows. To this effect, when I saw Rich Turner and Russ Alexander casually doing a apt-get install git on Windows to install git, I was excited. A lot.
But until the functionality showcased in the video above is mature and stable enough to be rolled out, I’ll continue using my current workflow which has served me faithfully since 2011: And that is bash on Windows (To be precise: A more “cut down” version of Bash. Read on for details).
The challenge: Production-strength command line workflow in Windows.
One might argue that Windows was never meant to be “driven” from the command line.
Microsoft tried to mitigate this back in 2006 by rolling out PowerShell, a shell and scripting language that gives users full access to their whole Windows environment. For Windows devs this was a great extra tool but for all other developers it was still not enough to lure them away from the power and versatility they found on the Linux command line.
Add to this the strongly opinionated naming conventions and approaches that PowerShell inherited from the .NET Framework (did you know that cd is but an alias to the “proper” command which is Get-ChildItem? That’s camelcase _and_ a dash that autocompletes with tab even if you type it in lowercase. Strange stuff) and you can see why it’s really hard for e.g. a PHP developer to consider it for his dev workflow.
When every single blogpost or article or tutorial written about a subject, e.g. “how to rebase branches in git”, includes instructions and screenshots that clearly demonstrate the flow in a Linux shell, it’s only natural for the developer to assume that this is the correct way of doing things.
Towards a solution: Install Git for Windows
For my frontend-with-a-bit-of-PHP-but-from-a-Windows-OS workflow I always relied on certain “battle proven” tools. WinSCP was the weapon of choice when files needed to be moved from one place to another (either via FTP, SFTP, SCP or even rSync). Putty allowed me to connect via SSH to all my dev boxes. TortoiseGIt ensured that I could use git directly from my Windows explorer interface.
The first “lightbulb / aha” moment for me occurred when I installed Git for Windows after being prompted to “try it out on the command line” by a colleague.
One of the steps of the install wizard prompts you to choose “How would you like to use Git from the command line?”:
Screenshot #2: Choosing how to use Git for Windows
… and it mentioned “Bash”!
Installation completes and suddenly I get a shell in Windows that looks suspiciously similar to what I’m used to in Linux or iOS installations:
Screenshot #3: MinTTY terminal emulator window
Bash in Windows: How it works
Kudos? To the awesome devs that worked to bring Git to windows – https://git-for-windows.github.io/.
In essence the installer sets up a unix-like shell environment (MinGW – “Minimalist GNU for Windows”) which – very roughly speaking – creates the needed Unix layer that shells like Bash can run onto.
A terminal emulator called MinTTY is also installed (shown in screenshot #3 above) which is a Windows program that runs the Bash shell which in turn enables you to use quite a good subset of the Linux commands needed for an open source dev workflow.
Looks are important
… especially if you are an ex-designer-turned-frontend-developer. Going from the black and white severity of cmd.exe (where you could not even resize the window to the dimensions you wanted) to MinTTY definitely boosted my “developer happiness” feeling:
Screenshot #4: MinTTY terminal emulator window
In the above example, I manually mapped the colours from the famous Solarized colour theme to the default 16 ANSI colours. For the font I chose the crystal clear Consolas font set at 12 point, although I’ve recently been experimenting with Adobe’s Source Code Pro as an alternative.
The MinTTY window can be resized to any dimension of your choosing. You can also use the same shortcuts as you use in the browser to resize the text on the fly (CTRL+plus, CTRL+minus or CTRL+mouse wheel). Finally you can launch as many instances of MinTTY as you want, enabling you to lay out a series of windows into your codebase and file structure, exactly as it suits you:
Screenshot #5: Multiple instances running at the same time at different dimensions and font-size
I can now do {{thing}} from the command line
The list below demonstrates just a small subset of the stuff you can do with Bash in Windows that I found particularly useful and / or helpful.
Git
No more “download and unzip”. Git clone any repo of your choosing in any directory in your filesystem. The handy “GIT Bash here…” shortcut that appears when you right click any folder is particularly useful here.
Linux command line
MinGW supports a subset of the various commands and programs available in Linux, things like awk, sed, grep, find are all here, ready to be used. Shortcuts are also available (CTRL+U, CTRL+K for inline editing, CTRL+R to lookup on Bash history etc) as well as piping and redirection.
SSH
OpenSSH works right out of the box. Set up your keys by using ssh-keygen (exactly the same way you would do in a Linux box) and then connect to any of your machines. You can also setup an ssh-agent (exactly the way Beanstalk or Github or Bitbucket explain in their online tutorials) to ensure you don’t retype your password all the time. Of course ftp and scp are available as well.
Vim
No more notepad++ for me. After I went through the steep-as-mount-Everest learning curve I found out that vim was the best tool for quick text edits (I’ve strongly resisted the urge to play with emacs. We’ll see).
Bash scripting
The very first bash script I experimented with (and use constantly nowadays) is z: https://github.com/rupa/z. I no longer rely on lengthy cd statements such as:
cd /some_directory/nesting/nested/my_work
But rather do a:
z my_work
… and I’m immediately taken to the directory I want.
“You should really switch to {{enter Linux distro name here}}”
Indeed. But even if I do so, there is still a vast number of devs out there who still need / have to work with Windows. One year ago, Isaac Schlueter (co-founder and CEO of the Node Package Manager – NPM) had this to say:
If you want devs using your code, this matters
Until WSL is out … Bash in Windows
The soon-to-be-released Windows Subsystem for Linux is a brilliant (and much-needed) step forward in making the Windows environment a first-class citizen for open source development workflows.Nevertheless, there is no need to wait for Microsoft to make WSL available to everyone.
I’ve been using Bash in Windows – in my daily workflow – for the last 5 years and it’s working like a charm.
If you want to do the same, simply install Git for Windows.